
Data Connector - How to Connect to Workday
Data Connector – How to Connect to Workday
Overview
RedFlag’s Data Connector Integration allows you to seamlessly sync recipient profile data from Workday into RedFlag—eliminating the need for manual uploads.
Once Workday is connected, you can map incoming fields to RedFlag profile fields. Data will sync automatically, keeping your recipient list up to date.
🛡️ Note: This feature must be enabled by RedFlag on the backend before configuration is available in your account.
Requirements for Workday Connection
- Create Integration System User (ISU)
- Create a Security Group
- Grant Security Permissions
- Activate Security Policies
- Configure Workday in RedFlag’s Data Connector
Prerequisites
🛡️ Note: You must have administrator privileges in Workday to create integration users and manage security permissions.
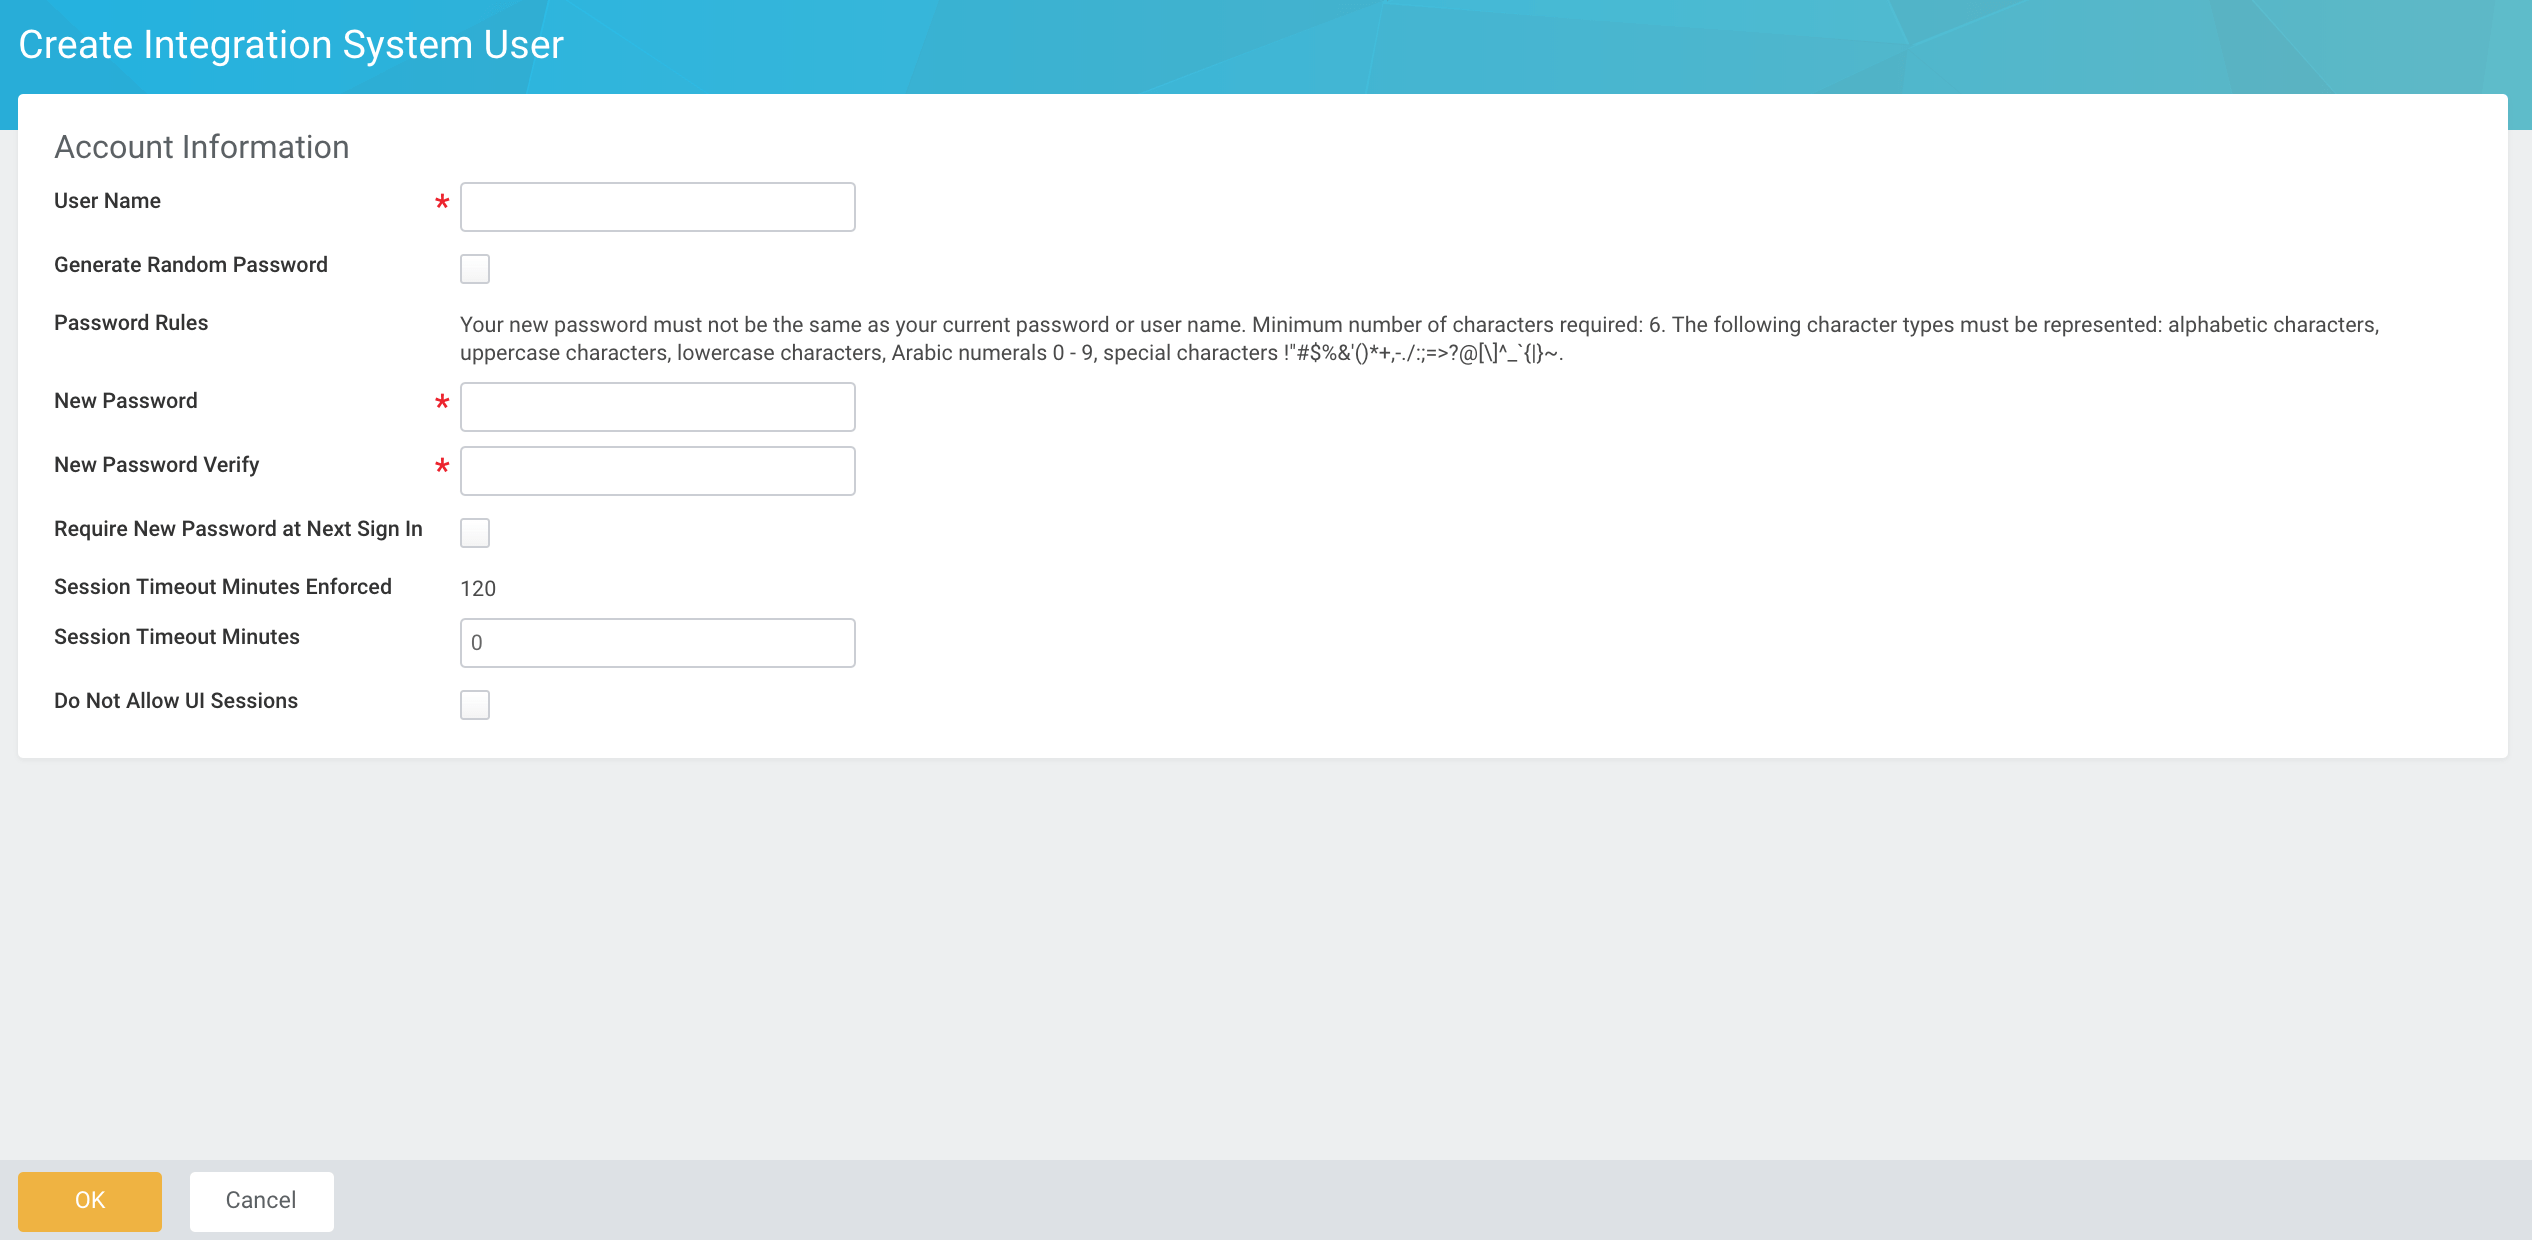
Create Integration System User (ISU)
- Navigate to the Create Integration System User task in Workday.
- Configure the user for RedFlag’s Data Connector.
- Set Session Timeout Minutes to
0to prevent expiration. - In Maintain Password Rules, add the ISU to System Users Exempt from Password Expiration.
- (Optional) Enable Do Not Allow UI Sessions to block login through the UI.
Create a Security Group
- Go to the Create Security Group task.
- Select Integration System Security Group (Unconstrained) as the type.
- Assign the Integration System User (ISU) you created.
Grant Security Permissions
For HRIS Integration:
- Person Data (Personal, Name, Home Contact, Work Contact)
- Worker Data (Compensation, Workers, Positions, Employment, Organization, Time Off, etc.)

Activate Security Policies
- Navigate to Activate Pending Security Policy Changes.
- Confirm all relevant security changes are active.
Configure Workday in RedFlag’s Data Connector
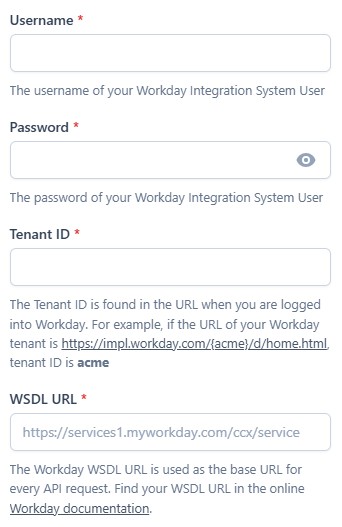
- Open RedFlag’s Data Connector.
- Enter the following credentials:
- Username: Workday ISU username
- Password: Workday ISU password
- Tenant ID: Found in your Workday URL (e.g.,
sample_companyinhttps://impl.workday.com/sample_company/d/home.html) - WSDL URL: From Public Web Services → Human Resources (Public) → Web Service → View WSDL in Workday
- Click Save to complete setup.
Your Workday account is now connected 🎉 After connecting, complete configuration to start importing your data.